Optim-wip: Add main Activation Atlas tutorial & functions #782
Conversation
|
@NarineK Test failures are due to an issue with the Captum Insights module according the error logs. I have also run the tests myself though on Colab instance without any errors, so this PR should be fine minus the Insight issue. |
|
The Class Activation Atlas tutorial notebook is the only thing missing after this PR for our activation atlas implementation. Like the main activation atlas tutorial, the class atlas tutorial has only about 440 lines when you ignore the formatting related lines. I'm not sure if you want to me also include it in this PR? The test failures seem to be occurring on all Captum branches and I made an issue for it here: #789 |
There was a problem hiding this comment.
@ProGamerGov, thank you for reducing LOC in this PR. I have done a pass for the changes in py files. I'll do another pass of the jupyter notebook and post the comments for that separately.
| Visualize a direction vector with an optional whitened activation vector to | ||
| unstretch the activation space. Compared to the traditional Direction objectives, | ||
| this objective places more emphasis on angle by optionally multiplying the dot | ||
| product by the cosine similarity. |
There was a problem hiding this comment.
since cosine similarity is also seen as normalized dot product, it sounds a bit unclear what cosine similarity is multiplied to what dot product.
There was a problem hiding this comment.
So, this is what AngledNeuronDirection does:
        if self.cossim_pow == 0:
            return activations * vec
        dot = torch.mean(activations * vec)
        cossims = dot / (self.eps + torch.sqrt(torch.sum(activations ** 2)))
        return dot * torch.clamp(cossims, min=0.1) ** self.cossim_pow
And this is what _dot_cossim does:
    dot = torch.sum(x * y, dim)
    if cossim_pow == 0:
        return dot
    return dot * torch.clamp(torch.cosine_similarity(x, y, eps=eps), 0.1) ** cossim_pow
There was a problem hiding this comment.
Thank you, @ProGamerGov! I saw that. I think the description of multiplying dot product by itself and normalizing it is a bit confusing. Is there any theoretical explanations for this.
There was a problem hiding this comment.
@NarineK From the Activation Atlas paper, I think this might answer your question:
We find it helpful to use an objective that emphasizes angle more heavily by multiplying the dot product by cosine similarity.... A reference implementation of this can be seen in the attached notebooks, and more general discussion can be found in this github issue.
The Lucid Github issue lists a bunch of different feature visualization objective algorithms, including the one we are using (I copied the relevant part from the issue below):
Dot x Cosine Similarity
- Multiplying dot product by cosine similarity (possibly raised to a power) can be a useful way to get a dot-product like objective that cares more about angle, but still maximizes how far it can get in a certain direction. We've had quite a bit of success with this.
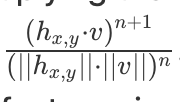
- One important implementation details: you want to use something like
dot(x,y) * ceil(0.1, cossim(x,y))^nto avoid multiplying dot product by 0 or negative cosine similarity. Otherwise, you could end up in a situation where you maximize the opposite direction (because both dot and cossim are negative, and multiply to be positive) or get stuck because both are zero.
There was a problem hiding this comment.
Okay, I've added a link to the Lucid Github issue detailing the reasoning behind the loss algorithm!
| return activations * vec | ||
|
|
||
| dot = torch.mean(activations * vec) | ||
| cossims = dot / (self.eps + torch.sqrt(torch.sum(activations ** 2))) |
There was a problem hiding this comment.
Shouldn't we divide by L2 norm for vec as well ?
There was a problem hiding this comment.
The code I've written follows after the implementation in the notebooks associated with the activation atlas papers:
- https://github.com/tensorflow/lucid/blob/master/notebooks/activation-atlas/activation-atlas-simple.ipynb
- https://github.com/tensorflow/lucid/blob/master/notebooks/activation-atlas/class-activation-atlas.ipynb
They setup the objective calculations like this:
@objectives.wrap_objective
def direction_neuron_S(layer_name, vec, batch=None, x=None, y=None, S=None):
  def inner(T):
    layer = T(layer_name)
    shape = tf.shape(layer)
    x_ = shape[1] // 2 if x is None else x
    y_ = shape[2] // 2 if y is None else y
    if batch is None:
      raise RuntimeError("requires batch")

    acts = layer[batch, x_, y_]
    vec_ = vec
    if S is not None: vec_ = tf.matmul(vec_[None], S)[0]
    # mag = tf.sqrt(tf.reduce_sum(acts**2))
    dot = tf.reduce_mean(acts * vec_)
    # cossim = dot/(1e-4 + mag)
    return dot
  return inner


@objectives.wrap_objective
def direction_neuron_cossim_S(layer_name, vec, batch=None, x=None, y=None, cossim_pow=1, S=None):
  def inner(T):
    layer = T(layer_name)
    shape = tf.shape(layer)
    x_ = shape[1] // 2 if x is None else x
    y_ = shape[2] // 2 if y is None else y
    if batch is None:
      raise RuntimeError("requires batch")

    acts = layer[batch, x_, y_]
    vec_ = vec
    if S is not None: vec_ = tf.matmul(vec_[None], S)[0]
    mag = tf.sqrt(tf.reduce_sum(acts**2))
    dot = tf.reduce_mean(acts * vec_)
    cossim = dot/(1e-4 + mag)
    cossim = tf.maximum(0.1, cossim)
    return dot * cossim ** cossim_pow
  return inner
The PyTorch objective merges these two objectives and follows what they do.
There was a problem hiding this comment.
Thank you, @ProGamerGov for the reference! I think that it would be good to cite those notebooks in the code because it is in general confusing if the formal definitions vary from the implementation. To be honest. I don't quite understand why they explicitly defined and implemented that way.
There was a problem hiding this comment.
@NarineK I'll add the references, and a note about how the reference code differs slightly from the implementation described in the paper!
There was a problem hiding this comment.
I also have yet to figure out why their implementation is slightly different than the paper, but I figured that I should follow the working reference implementation rather than the paper's equations for now!
captum/optim/_utils/atlas.py
Outdated
| return indices | ||
|
|
||
|
|
||
| def extract_grid_vectors( |
There was a problem hiding this comment.
Does this method need to be public ? I don't see it used in the tutorial.
There was a problem hiding this comment.
It's called in the main tutorial in the final section on class filtering of atlas results.
There was a problem hiding this comment.
I will look into it in combination with reviewing the tutorials. Thank you!
There was a problem hiding this comment.
@NarineK Do you want me to add the class atlas tutorial notebook to this PR, considering that it's only atlas related thing left that's not in this PR?
There was a problem hiding this comment.
@ProGamerGov, since this PR is getting large let's add it in a separate PR.
captum/optim/_utils/atlas.py
Outdated
|
|
||
| Returns: | ||
| cells (torch.tensor): A tensor containing all the direction vector that were | ||
| created. |
There was a problem hiding this comment.
above this line do you mind describing the dimensionally of cells as well ?
Is it maximum grid_size[0] * grid_size[1] x n_channels?
There was a problem hiding this comment.
@ProGamerGov, do you mind describing the expected dimensionalities for cells similar to ? It helps with the better understanding and review cell_coords
There was a problem hiding this comment.
@NarineK Okay, I've added the correct shape of the cell vectors! The shape is really simple as it's: [n_vecs, n_channels]
There was a problem hiding this comment.
Thank you for the explanation, @ProGamerGov ! I meant adding dimensions as description in lines 113 - and 114. With n_vecs do you mean the number of tensors ?
There was a problem hiding this comment.
@NarineK Yeah, the direction vectors are stacked along the batch dimension!
captum/optim/_utils/atlas.py
Outdated
| y_extent (Tuple[float, float], optional): The y axis range to use. | ||
|
|
||
| Returns: | ||
| indices (list of list of tensor): Grid cell indices for the irregular grid. |
There was a problem hiding this comment.
nit: Can we describe what are those indices ? Are they indices of samples in a batch ?
There was a problem hiding this comment.
@ProGamerGov, do you mind describing the dimensionalities for indices. It looks like that it performs logical and between x and y bounds. Do you mind describing what the cell indices represent?
There was a problem hiding this comment.
@NarineK Okay, I've written up a basic description of the format and dimensionalities of the indices variable! Hopefully it helps you better understand what is going on, and I'm working to add it to the documentation.
The calc_grid_indices function draws a 2D grid across the irregular grid of points, and then groups point indices based on the grid cell they fall within. These grid cells are then denoted by their x and y axis positions. The grid cells are then filled with 1D tensors that have anywhere from 0 to n_indices values in them.
The grid cell have their indices stored in a list of list of tensors. The outer lists represent the x axis cell coordinates, while the inner lists the y axis cell coordinates.
Below is an example of the indice list format for a grid size of (3, 3):
indices = [
               x1[y1, y2, y3],
               x2[y1, y2, y3],
               x3[y1, y2, y3],
          ]

# Each pair of x and y has a tensor with a size of 0 to n_indices
Each set of grid cell indices is then retrieved like this:
indices = # The 3x3 indices from above

# Iterate through all 9 cells:
for ix, enumerate(x_coords) in 3:
    for iy, enumerate(y_coords) in 3:
        cell_indices = indices[ix][iy] # All indices for the current grid cell

        # The extract_grid_vectors function averages all index points
        # in this 1D tensor list together into a single value:
        cell_vec = torch.mean(raw_activations[cell_indices], 0)

        # Each grid cell's average value is then used as the grid cell direction vector.
There was a problem hiding this comment.
@NarineK It might be a bit tricky to summarize this explanation into the documentation text after the variable name, so I might have to put it in the function descriptions instead. Unless you have a better a better idea?
There was a problem hiding this comment.
@ProGamerGov, I think that the following is a good description of indices. Do you mind adding that documentation as a comment starting from line 64 ?
The calc_grid_indices function draws a 2D grid across the irregular grid of points, and then groups point indices based on the grid cell they fall within. These grid cells are then denoted by their x and y axis positions. The grid cells are then filled with 1D tensors that have anywhere from 0 to n_indices values in them.

The grid cell have their indices stored in a list of list of tensors. The outer lists represent the x axis cell coordinates, while the inner lists the y axis cell coordinates.

Below is an example of the indice list format for a grid size of (3, 3):

indices = [ x1[y1, y2, y3], x2[y1, y2, y3], x3[y1, y2, y3], ]
 Each pair of x and y has a tensor with a size of 0 to n_indices
There was a problem hiding this comment.
Regarding extract_grid_vectors function, you can describe high level idea. No need to describe each variable. With the description I meant describing high level idea and expected dimensionality for the matrices or vectors that we return and make available in the public API.
There was a problem hiding this comment.
@NarineK Awesome! I think that I've summarized it nicely with the following:
def calc_grid_indices(
    xy_grid: torch.Tensor,
    grid_size: Tuple[int, int],
    x_extent: Tuple[float, float] = (0.0, 1.0),
    y_extent: Tuple[float, float] = (0.0, 1.0),
) -> List[List[torch.Tensor]]:
    """
    This function draws a 2D grid across the irregular grid of points, and then groups
    point indices based on the grid cell they fall within. The grid cells are then
    filled with 1D tensors that have anywhere from 0 to n_indices values in them. The
    sets of grid indices can then be used with the extract_grid_vectors function to
    create atlas grid cell direction vectors.

    Indices are stored for grid cells in an xy matrix, where the outer lists represent
    x positions and the inner lists represent y positions. Each grid cell is filled
    with 1D tensors that have anywhere from 0 to n_indices index values inside them.

    Below is an example of the index list format for a grid_size of (3, 3):
    indices = [x1[y1, y2, y3], x2[y1, y2, y3], x3[y1, y2, y3]]

    Grid cells would then be ordered like this, where each cell contains a list of
    indices for that particular cell:
    indices = [[0, 1, 2], [3, 4, 5], [6, 7, 8]]

    Args:
        xy_grid (torch.tensor): The xy coordinate grid activation samples, with a shape
            of: [n_points, 2].
        grid_size (Tuple[int, int]): The grid_size of grid cells to use. The grid_size
            variable should be in the format of: [width, height].
        x_extent (Tuple[float, float], optional): The x axis range to use.
            Default: (0.0, 1.0)
        y_extent (Tuple[float, float], optional): The y axis range to use.
            Default: (0.0, 1.0)
    Returns:
        indices (list of list of torch.Tensors): List of lists of grid indices
            stored inside tensors to use. Each 1D tensor of indices has a size of:
            0 to n_indices.
    """
There was a problem hiding this comment.
thank you for adding the documentation, @ProGamerGov! Since the returned tensors represent List[List[torch.Tensor]] wouldn't then the output look something like this ?
indices = [[tensor([0, 5]), tensor([1]), tensor([2,3])], [tensor([]), tensor([4]), tensor([])], [tensor([6,7,8]), tensor([]), tensor([])]]
instead of [[0, 1, 2], [3, 4, 5], [6, 7, 8]] ?
There was a problem hiding this comment.
@ProGamerGov, overall the PR looks good. Thank you for addressing my comments. I was wondering if my understanding here is valid and whether we can update the doc accordingly.
There was a problem hiding this comment.
@NarineK Oops, sorry I missed this comment! So for the example, I should have probably mentioned that [[0, 1, 2], [3, 4, 5], [6, 7, 8]] is describing the order for the 3x3 grid example. I've updated the doc to explain this:
    """
    Below is an example of the index list format for a grid_size of (3, 3):
    indices = [x1[y1, y2, y3], x2[y1, y2, y3], x3[y1, y2, y3]]

    Grid cells would then be ordered like this:
    indices = [[0, 1, 2], [3, 4, 5], [6, 7, 8]]

    Each cell in the above example would contain a list of indices inside a tensor for
    that particular cell, like this:
    indices = [
        [tensor([0, 5]), tensor([1]), tensor([2, 3])],
        [tensor([]), tensor([4]), tensor([])],
        [tensor([6, 7, 8]), tensor([]), tensor([])],
    ]

    Args:
    """
tests/optim/utils/test_atlas.py
Outdated
| indices = atlas.calc_grid_indices( | ||
| xy_grid, grid_size=(1, 1), x_extent=(1.0, 2.0), y_extent=(1.0, 2.0) | ||
| ) | ||
| assertTensorAlmostEqual(self, indices[0][0], torch.tensor([24]), 0) |
There was a problem hiding this comment.
Is this 24th datapoint in the xy_grid ? indices return only one data point ?
There was a problem hiding this comment.
No it's just the value at that specific index is equal to 24. The indices variable only contains a single index for this test due the inputs given to calc_grid_indices.
There was a problem hiding this comment.
I see - 24 is the 24th (sample) index in the xy_grid (25 x 2) tensor, isn't it ?
There was a problem hiding this comment.
It's the 25 item in the list (which counting from 0 is 24), because this test is setting the lower end of the x_extent and ``y_extent. If we had the default extents, then the output would be:nar
[[tensor([ 0, 1, 2, 3, 4, 5, 6, 7, 8, 9, 10, 11, 12, 13, 14, 15, 16, 17,18, 19, 20, 21, 22, 23, 24])]]
There was a problem hiding this comment.
We start off with a tensor that looks like this:
x_grid = tensor([[ 0.,  1.],
        [ 2.,  3.],
        [ 4.,  5.],
        [ 6.,  7.],
        [ 8.,  9.],
        [10., 11.],
        [12., 13.],
        [14., 15.],
        [16., 17.],
        [18., 19.],
        [20., 21.],
        [22., 23.],
        [24., 25.],
        [26., 27.],
        [28., 29.],
        [30., 31.],
        [32., 33.],
        [34., 35.],
        [36., 37.],
        [38., 39.],
        [40., 41.],
        [42., 43.],
        [44., 45.],
        [46., 47.],
        [48., 49.]])
Then we normalized the tensor so that it looks like this:
normalized_x_grid = tensor([[0.0000, 0.0000],
        [0.0417, 0.0417],
        [0.0833, 0.0833],
        [0.1250, 0.1250],
        [0.1667, 0.1667],
        [0.2083, 0.2083],
        [0.2500, 0.2500],
        [0.2917, 0.2917],
        [0.3333, 0.3333],
        [0.3750, 0.3750],
        [0.4167, 0.4167],
        [0.4583, 0.4583],
        [0.5000, 0.5000],
        [0.5417, 0.5417],
        [0.5833, 0.5833],
        [0.6250, 0.6250],
        [0.6667, 0.6667],
        [0.7083, 0.7083],
        [0.7500, 0.7500],
        [0.7917, 0.7917],
        [0.8333, 0.8333],
        [0.8750, 0.8750],
        [0.9167, 0.9167],
        [0.9583, 0.9583],
        [1.0000, 1.0000]])  # coord index 24
Then it's run through the calc_grid_indices function to group everything based on a grid that's x-axis is 1.0-2.0, and the y-axis is 1.0-2.0. Because we changed the starting part of the x & y axes, only the final 25th value with an index of 24 is used.
captum/optim/_utils/atlas.py
Outdated
| assert all([c.device == cells[0].device for c in cells]) | ||
| assert cells[0].dim() == 4 | ||
|
|
||
| cell_b, cell_c, cell_h, cell_w = cells[0].shape |
There was a problem hiding this comment.
nit: Do you mind describing what the expected dimensions are in a comment?
There was a problem hiding this comment.
@NarineK Can you elaborate on what you mean by that? Each cell image is supposed to an NCHW tensor.
There was a problem hiding this comment.
@ProGamerGov, yes, I think it would be good to document the dimensionality of cells
There was a problem hiding this comment.
Oh, I see what you mean as the batch dimension being used for atlas creation only works when inputs are provided as lists.
I think that the solution might be to just add assert all([c.shape[0] == 1 for c in cells]), and then individuals will have to run the function again if they have multiple atlases to create? Unless I add some additional code to handle multiple sets of atlas image cells stacked along the batch dimension, with something like this:
        if torch.is_tensor(cells):
            assert cast(torch.Tensor, cells).dim() == 4
            if cells.shape[0] > len(coords):
                assert cells.shape[0] % len(coords) == 0:
                ....
            else:
                cells = [c.unsqueeze(0) for c in cells]
Or maybe it can just be left how it is for right now.
There was a problem hiding this comment.
The cells variable used to create the final atlas is simply a list of equal sized NCHW image tensors, where the length of the list is equal to the number of coordinates given.
There was a problem hiding this comment.
Thank you for the explanation, @ProGamerGov! I only meant to comment in the code that
cell_b -> number of images
cell_c -> image channel
cell_h ->  image hight
cell_w -> image width
Also since this is image specific it would make sense to move atlas.py under _utils/image.
There was a problem hiding this comment.
@NarineK Ah, okay I've added the comments for cell dimensionality!
* Underscore rotation class functions
* Fix & improve documentation.
* Revert weight heatmap variable name changes.
* Correct rotation transform bug.
|
@NarineK I've discovered an issue that is likely to affect Captum.optim users performing optimization tasks like activation atlases, activation grids, and other tasks involving a large number of loss functions / objectives being used at once. Lucid defines a special sum operator function for dealing with large lists of objectives and up until now I didn't really understand why it existed. Just like Lucid's loss composition, Captum's loss composition runs into recursion errors if more than about 300 loss functions are used at a time. Luckily activation atlas sizes in the tutorial are under this limit, but it presents an issue for larger atlases as we are pretty close to the limit. I propose that we add our own special function for handing large volumes of loss functions / objectives, and I have taken the time to create one that's similar to Lucid's sum function below: We then use the function like this: Testing of this proposed solution shows that upwards of 5000+ loss functions can be used at once. This solution also has the added benefits of being composable itself with other loss functions. A second alternative to the above solution is to simply split the optimization tasks into batches like so, however this approach is significantly slower than using the above solution: A third solution to this problem would be for the user to manually raise the maximum recursion depth allowed by Python using However messing with this limit could be rather dangerous for users. Without using any of these solutions, users will be confronted with this error message if they go over the recursion limit: |
|
I think that I'll put the |
* Add `sum_loss_list()` to `optim/_core/loss.py` with tests.
* Replace `sum()` with `opt.loss.sum_loss_list()` in ActivationAtlas tutorial notebook.
* Correct `target` type hints for `Loss`, `BaseLoss`, and `CompositeLoss`. The correct type hint should be `Union[nn.Module, List[nn.Module]]` as that is what the code supports and uses.
Ah, thank you for discovering this issue and proposing the solution, @ProGamerGov! |
|
@NarineK The built-in The current loss composition system combines losses like a sort of Russian nesting doll, leading to the recursion issue when using more than 300 losses at a time. This includes the built-in Lucid put their function as class function for their equivalent of the Currently this solution is used in the "Rendering The Activation Atlas Visualizations" section of the ActivationAtlas notebook, though the built-in |
|
I fixed up the
The improvements made to |
94d7ad2 to
18b017f
Compare
* The `torch.jit.is_scripting()` function isn't supported by earlier versions of PyTorch. So I've come up with a better solution that will still support earlier versions of PyTorch.
* Exposed `align_corners` parameter to `RandomRotation` class initialization.
* Improved `RandomRotation` class documentation.
* Ludwig wanted this according to his original PR.
* Also fix mypy bug.
|
@NarineK The "lint_test_py37_conda" is often timing out on the "Install dependencies via conda" step, and I'm also seeing the following Mypy error pop up in the "lint_test_py36_pip_release" test: I also sometimes see errors like these when running the tests myself: I'm not sure if we should keep plugging the holes until we merge the optim library, if we should just ignore the failures, if we should just disable checks on the other modules for now? |
* Added `torch.distribution` assert check and more extensive testing for the RandomRotation transform.
@ProGamerGov, if we rerun the tests this issue might have already been fixed |
|
@NarineK Are you referring to the Mypy type hint issue with |
|
Thank you for refining this PR, @ProGamerGov! The tutorial looks awesome!!! I took some time and reviewed the tutorial. It looks like you made some changes in python files as well. I'lll have another look.
|
* `extract_grid_vectors` -> `compute_avg_cell_samples`

* Improved documentation, and added better descriptions to the main atlas tutorial notebook.
|
@NarineK I've made all the suggestion improvements, so let me know how it looks now! 1 & 2. I've fixed those issues! 3 & 4. I just removed
10 & 11. I added more documentation and tried to better describe what we are doing with the attributions. |
|
There was an unrelated mypy error but it was unrelated to the PR. |
This PR simplifies the commit history of #579